As an RV owner, you probably start itching to get out on the road at the first signs of spring. The weather is finally nice enough to truly enjoy all your favorite outdoor adventures with friends, family, or even solo. However, there are several things you’ll need to do to de-winterize your RV before it’s ready for long hours on the road.
Hopefully, you winterized your vehicle’s plumbing system to prevent the pipes from freezing and bursting. Now, you’ll need to de-winterize your RV water system, as well as check on your RV batteries, tires, and other appliances. Before you head to your favorite spring destinations, you’ll need to take care of a few things. Roll up your sleeves, RVers!
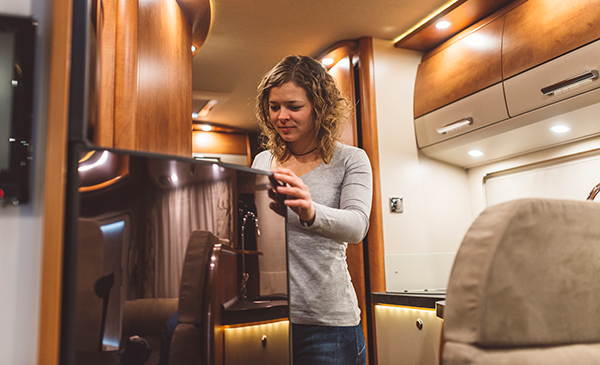
De-Winterize Your RV Water System
 To winterize your RV in preparation for winter, you probably pumped RV antifreeze throughout your plumbing system. If you didn’t, you may have some very expensive damage to your RV water system. If you did winterize your rig, then it’s time to remove all that pink stuff from the pipes. You’ll then want to sanitize the water system, so you and your loved ones do not get sick. Of course, you have the option to pay an RV technician to de-winterize for you. However, these are very important and easy steps you can take on your own, without the help of a professional.
Removing RV Antifreeze from Your Pipes
Did you use non-toxic RV antifreeze when you winterized your vehicle? Then, you should just be able to run fresh water to clean out the system. Make sure to run the water until it’s clear. If you added RV antifreeze to the freshwater holding tank when you winterized your vehicle, you’ll want to drain all the antifreeze from the tank first. Add potable water to the tank. Turn on the water pump and open the faucets. Keep running the water until you see absolutely no pink residue. That’ll mean you’re all set to use your sink(s)!
Your outdoor shower, toilet, and any other gadgets that use water (ice maker, washing machine, etc.) all need to be drained, too. Run fresh water through the whole system. If you can take your water heater out of by-pass mode, do it. If not, drain the antifreeze from the water heater. After the water runs clear, reinstall the filter cartridges you removed when you winterized your RV.
Sanitizing Your RV Fresh Water System
Now, onto the next step of the de-winterizing process. Before you begin sanitizing your freshwater tank, all drains must be closed and your drain plugs must be installed.
 Take a quarter cup of regular household bleach for every 15 gallons your freshwater tank can hold.
- In a gallon container, mix the bleach with water.
- Pour the mixture into the holding tank.
Some RVs do not have a freshwater fill. In that case, you can pour the bleach and water solution into the drinking hose that connects to the RV at one end and to a water source at the other end. Fill the holding tank full of water. Then, turn on the pump to run the water through all hot and cold faucets. After you detect the scent of bleach, close the faucets and let the mixture sit overnight. Afterward, drain the bleach-water solution and fill the tank with freshwater. You may need to repeat this step a few times to get rid of all the bleach. Make sure you’re very thorough in this step.
Charging RV Batteries
Even if you do all the other tasks to de-winterize your RV yourself, we recommend having your battery prep done by an authorized RV repair technician. If you choose to do this yourself, make sure you are very careful.
 You’ll need to wear safety glasses and latex gloves. Before doing anything, disconnect shore power, turn off the RV and the main cutoff. Hopefully, you stored your RV batteries very carefully during winter because they’re expensive to replace. If you did, they should be clean. If they’re not, you can use hot water and baking soda to scrub them. However, you will need to buy a new battery if there are any cracks.
When your battery is in storage, it can lose quite a bit of current through internal leaks, approximately 10% per month. If you recharged your batteries over the winter, they should be fully charged. Always check your battery levels before driving off on a long trip. Some people remove the batteries before putting their vehicles in storage. Make sure the batteries are fully recharged before placing them back on. More importantly, make sure you connect the batteries properly after reinstalling them.
After charging, check the water level of your batteries. If it is too low, distilled water should be added to lead-acid batteries according to the manufacturer’s specifications. The plates on your batteries should always remain covered.
RV Tire Pressure
 While in storage, tires will naturally lose air pressure, typically at 2-3 psi per month on average. You’ll want to check the air in your RV tires with a very high-quality gauge. Don’t forget to check your spare tire, too! Be sure to check what the tire manufacturer’s suggestions are for air pressure based on the weight of your vehicle and the approximate weight of the load you will be hauling in it.
Check all tires for nails and cracks along the sides. Give all of your tires a good long look to avoid uneven handling or a blowout while you’re driving. Make sure the tread is not too low, either. There’s nothing worse than hydroplaning in an RV.
RV Appliances
What’s the next step to de-winterize your RV? Checking your RV appliances. You’ll want to check all the LP gas-fueled appliances first. See if the seals and hoses are still in good shape, not dried out, cracked, or destroyed by rodents. Turn off all LP items. Make sure to fill the water heater before testing it for heat. Chances are that it will work just as you left it. Also, check electrical appliances like your refrigerator in electric mode to make sure they are running properly.
If your water heater isn’t working properly, it will most likely be costly to repair. It will also have to be done by a professional RV service technician. If you do not have a person in mind, contact the dealership where you purchased your RV and find one ASAP. A gas system check for leaks and gas operating pressure should be done annually, only by a licensed professional. If you suspect you have a leak, have an RV service technician look at your rig right away.
RV Generators & Engine
It’s time to check your RV generators and engine. This is an important step to de-winterize your RV before you get back on the road.
- Motorized RV. Check all fluid levels in your RV according to your owner’s manual specifications. You may want to have a professional RV repair technician look at your RV if your fluids are suddenly very low.
- Onboard Generator. Check your generator to make sure you’re not low on oil. Your generator should be serviced regularly for an oil and filter change. See how often your owner’s manual recommends having your generator serviced. If there is any problem with your exhaust system do not run the generator. If you didn’t use a fuel stabilizer to winterize it and it won’t start, you will need to have it serviced at an RV service facility.
Sewage Hoses & Waste Tank
 The next step is making sure your hoses are free of holes and leaks. Rodents often gnaw through some of the most unexpected items while RVs are in storage. Start with an empty waste tank. Check the valves to make sure the seals are in good shape. Do this by moving the handle gently, to ensure it works smoothly. If it sticks, you can apply valve lubricant to the tanks. Remember, you don’t want to wait to find out you have a leak at the dumpsite.
RV Safety Devices
Before hitting the open road, it’s a good idea to check your RV safety devices. This includes your back-up camera, GPS, fire extinguisher, and any other devices that help with safety or navigation. Mainly, you’ll want to make sure all your batteries are working. Replace any batteries that are dead and always bring spares when you travel. If you didn’t remove your devices’ batteries during storage, they may not have much juice left at all. If you have an on-board fire extinguisher (which is a smart idea), check the date and replace it if needed.
RV Insurance
Either before or after you de-winterize your RV, you’ll want to check on your RV Insurance, too. It’s important to have the right coverage while you’re on the road. You never know when you might get into an accident or need roadside assistance. And regular Auto Insurance probably won’t cover any damages or bodily injury caused in an RV mishap. To get a free RV Insurance quote and the best rates on coverage, call (866) 501-7335 today. Once you reviewed your policy and de-winterize your RV, it’s time to start planning your spring break destinations! Check out some of the best spring break campsites here.
The information in this article is obtained from various sources. This content is offered for educational purposes only and does not represent contractual agreements, nor is it intended to replace manuals or instructions provided by the manufacturer or the advice of a qualified professional. The definitions, terms, and coverage in a given policy may be different than those suggested here. Such policy will be governed by the language contained therein, and no warranty or appropriateness for a specific purpose is expressed or implied.