No one likes a guest who leaves behind a huge mess, especially at RV campsites. In fact, you may even get banned from a campsite if you do damage or leave behind the unsightly remains of a campfire. Putting out a campfire may sound easy but some people are completely clueless about how to put out a campfire, even when they can build a great one. It’s not as easy as pouring water over the pit. Here’s how to do it right without worry about getting yourself a bad reputation.
Look for Part I of this series: Choosing Your Fire Wood and Step and Part II: How to Build a Campfire in our previous weeks’ blogs.
Step 1: Let it Burn
 A fire does eventually die out on its own. However, it’s not a good idea to leave the pit and go off to sleep, assuming that everything will be alright. What if a spark catches nearby and you start a huge fire? It’s happened to the best campers, believe it or not.
You should let a fire begin to die down before putting it out. With a stick, break up the wood so the fire burns faster and more evenly.
Let all the wood burn down to ash if you can.
Step 2: Get the Water
If you pour water over your fire and it smokes a lot, let it burn for a while before you pour more water over the pit.
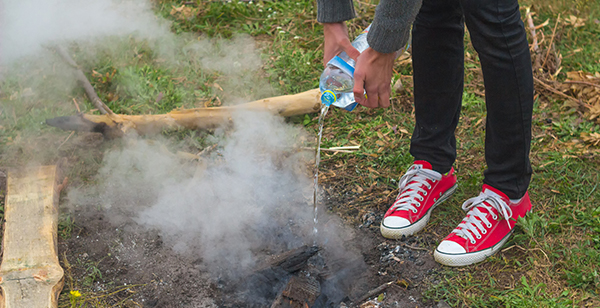
Make sure to pour the water evenly, even in areas that aren’t sparking. There may still be wood or kindling burning but it’s just not visible. Pour up and down and then side to side.
Keep pouring water on the campfire until it stops smoking and hissing.
Step 3: Stir it Up
Use a stick to stir the fire around to reveal where it’s still burning. Cover everything with water. Mix until there are absolutely no sparks and embers.
Step 4: Scrape What’s Left
You can use a stick or shovel to do this. Just scrape the wood to make sure all embers are out. Stir again.
Step 5: More Water
If the wood is still burning while doing step 4, just pour more water.
Step 6: Touch It
Obviously, do not stick your hand in a fire pit if there is still smoke and embers, but if you suspect that after your final dousing with water, touch the wood and see if it feels cold or really hot. If it’s still hot, it may still be burning, so inspect it closely.
Step 7: What about the Rocks?
If you have rocks near or in the fire ring, touch them too. If they feel cool, you’re good to go. If they are hot, it may be that there is still a fire smoldering beneath.
Step 8: Wet it All Over Again

Yeah, by now you’re thinking, how much water does this thing need to go out? This step is an added precaution, especially if you’re leaving camp soon afterwards. There’s nothing worse than finding out that a fire spread after you left to go home, especially if people (especially children) got hurt or property got damaged. If you’ve run out of water at this point, you can use dirt but mix it into the fire pit while stirring everything around. Avoid completely burying any live embers with dirt.
Step 9: Look All Around
Make sure there are no live sparks and embers anywhere around you. Sparks do have the tendency to fly and catch fire elsewhere.
Step 10: Back to the Pit
Check the area closest to the pit last before you hop in your RV to leave. You may need to douse small remaining embers with water (yes, more water!).
It’s always best to give yourself some time to do this so you can feel certain that your fire is completely out. Try not to leave the chore of putting out your campfire to the last minute.
The information in this article was obtained from various sources. This content is offered for educational purposes only and does not represent contractual agreements, nor is it intended to replace manuals or instructions provided by the manufacturer or the advice of a qualified professional. The definitions, terms, and coverage in a given policy may be different than those suggested here and such policy will be governed by the language contained therein. No warranty or appropriateness for a specific purpose is expressed or implied.
