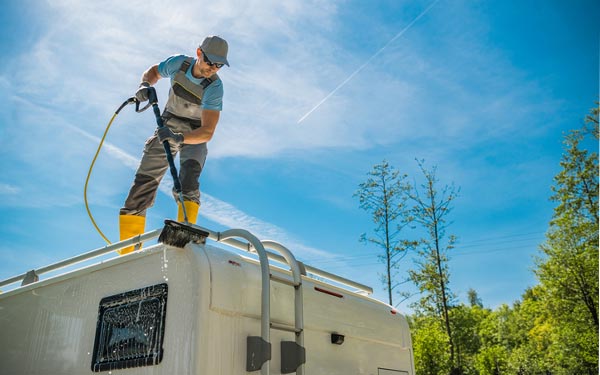
As an RV owner, you probably itch to get back on the road at the first signs of spring. With the weather finally clearing up, it’s almost time to enjoy your favorite outdoor pastimes with friends, family, or maybe on your own. Either way, there are several things you’ll need to do to properly dewinterize your RV before heading towards your favorite spring destinations. So, if you’re ready and your sleeves are rolled up, follow this guide to prepare your RV for the season ahead.
When Should I Dewinterize My RV?
If your RV is in storage, when should you begin the dewinterizing process?
Truthfully, you can begin dewinterizing an RV whenever temperatures are consistently above freezing. Depending on where you live, this may be much sooner or later in the year. However, practicing patience is important. You don’t want to risk dewinterizing only for a late-season cold snap to roll through. For example, suppose you dewinterize too early, and your pipes freeze with water in your tanks. In that case, you could damage your RV’s water system, which is an expensive repair.
How to Dewinterize an RV
Reinstall or Charge RV Batteries
To begin dewinterizing an RV, we recommend you start by ensuring your RV battery, or batteries, are in good condition. In storage, RV batteries can lose their charge due to internal leakage. However, you can avoid this by periodically checking and recharging your batteries during your RV’s off-season.
Using a voltmeter, check the charge of your batteries. A fully charged 12-volt RV battery should actually read 12.7 volts. If the reading comes in below, you should charge it before heading out on your first trip. You can use an RV battery charger to charge your batteries. Once charged, check on their water levels and add distilled water if needed according to the manufacturer’s specifications. If water levels are below the plates, add water before charging, as battery plates should always be covered.
If you are uncomfortable handling or installing RV batteries, you can always refer to an RV maintenance service to do the job for you.
Double Check Your RV’s Tires
While in storage, it’s normal for RV tires to lose a bit of air pressure, typically 2-3 psi per month.
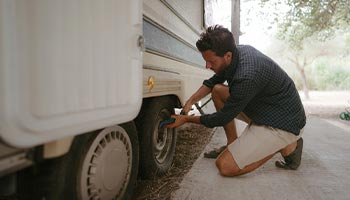
Before heading out on your first trip, it’s essential to check your tire pressure and add air if necessary. Failing to do so could affect RV handling, cause uneven wear, or result in a tire blowout and accident. To avoid potential issues, use a tire pressure gauge to check the air pressure of your RV’s tires—don’t forget the spare! You can refer to your owner’s manual if you’re unsure what air pressure your tires should be.
Additionally, use this time to visually inspect your wheels for any signs of extended wear, such as low treads or cracks. Replacing tires at the beginning of the season can help you avoid any trip disruptions later in the year.
Dewinterizing Your RV’s Water Systems
When winterizing your RV in the fall, you likely added RV antifreeze to your water systems to keep them from freezing. Now that it’s spring, it’s time to drain and flush those liquids out properly so your water is clean and safe to use.
Did you add antifreeze directly to your freshwater holding tank? If so, your first step should be to drain the tank entirely. Next, add fresh water back into the holding tank and follow these steps:
- Turn on the water pump.
- Open all RV water faucets (sinks, showers, etc.).
- Allow water to run until clear and without bubbles.
- Flush toilet(s) while the pump is running.
- Once the water runs clear, turn off the water pump and faucets.
- Take your RV’s water heater out of bypass mode if applicable. If not applicable, drain and flush antifreeze from the water heater before moving to the next step.
- Replace any water filter cartridges you removed before winter storage.
- Dispose of liquid waste properly.
How to Sanitize Your RV’s Water System
Now that your RV is flushed, it’s time to sanitize your RV’s water system. Even if you didn’t use antifreeze during winter, sanitizing your water system is essential to remove mold or bacteria that may have moved in while your rig was in storage.
To sanitize your RV’s water system, follow these steps:
- First, close all faucets and install your drain plugs.
- Measure a 1/4 cup of regular household bleach for every 15 gallons your freshwater tank can hold.
- Pour the bleach into a gallon container, fill it with water, and add this mixture to your freshwater tank.
- Fill the freshwater tank with potable water.
- Turn on your water pump to run water through all hot and cold faucets.
- Once you detect the smell of bleach, close all taps and let the bleach mixture sit overnight.
- After at least a few hours, drain the bleach-water solution and again fill the tank with fresh water.
- Run each faucet until you no longer smell bleach.
Check Your Safety Devices

The next step to dewinterize your RV is to check and ensure your safety devices are functioning properly. This can include your backup camera, GPS, fire extinguisher, smoke alarms, and gas detectors. You can also use this time to replace old batteries from any battery-powered devices. Remember to replace any spare batteries you use.
Take a Look Under the Hood
Before hitting the road, always look under the hood to ensure your RV engine is in good shape and that all fluids are at their correct levels according to your owner’s manual. This includes checking the fluid levels of the RV’s transmission, engine oil, brake fluid, coolant, and windshield washer fluid. If levels are too low, top them off or take your RV in for service if you suspect there may be a leak somewhere.
Don’t Forget About Your Onboard Generator
If your RV has an onboard generator, don’t forget to check its oil levels. To keep it running at its best, you should regularly service your RV’s generator with oil and filter changes. Your owner’s manual should have more information on the recommended service schedule for your generator. Important note: if there is any problem with your exhaust system, do not run the generator, as this could cause further damage.
If your generator surges or has difficulty starting, we recommend having a professional take a look.
Restock First Aid and Emergency Supplies

The final crucial step to dewinterize your RV is to restock your emergency cabinet. Whether you replace expired medicines or add to your first-aid kit, use the beginning of the season to replenish any emergency supplies that are running low. At the very least, your RV emergency kit should include the following:
- Basic first-aid materials.
- GPS and area maps.
- Tools for RV repairs.
- Bottled water.
- Canned foods.
- Any other supplies that you may find useful in an emergency.
Protect Your RV All Season Long with RV Insurance
Whether it’s before or after your dewinterize your RV, be sure to check on your RV insurance, too. Having the right amount of coverage is important whenever you’re out on the road. If you adjusted your policy while your RV was in storage, now is an excellent time to add back any coverages you’ll need for the coming season, like RV roadside assistance or personal property coverage. To learn more about RV insurance and how our agents can help you craft an ideal policy, call (866) 501-7335.
The information in this article is obtained from various sources and is offered for educational purposes. Furthermore, it should not replace manuals or instructions provided by the manufacturer or the advice of a qualified professional. No warranty or appropriateness for a specific purpose is expressed or implied.